Introduction to Cannoli Cookies
If you love traditional Italian cannoli, then prepare to be delighted by the whimsical twist that is cannoli cookies! These little treats pack all the classic flavors of the beloved cannoli into a convenient cookie form, making them perfect for both snacking and entertaining. But what really makes these cookies so special? Let’s dive in!
Why are Cannoli Cookies a fun twist on a classic dessert?
Cannoli cookies capture the rich, creamy filling and sweet notes of the classic dessert, but with a fun and practical edge. Imagine the delightful crunch of a cookie, paired with a luscious ricotta filling and the unmistakable essence of vanilla and citrus. You get the best of both worlds!
What’s wonderful about cannoli cookies is their versatility. They’re not only a great addition to your dinner party dessert table, but they also work beautifully in lunchboxes or as a sweet pick-me-up during a busy workweek. Plus, they’re easy to customize. Want a hint of chocolate? Go ahead and add mini chocolate chips or drizzle melted chocolate on top!
According to experts at the Italian Academy of Cuisine, the traditional cannolo hails from Sicily, showcasing the region’s passion for rich desserts. Cannoli cookies take this heritage and modernize it for our fast-paced lives. As a busy young professional, you can enjoy gourmet flavors without the fuss of crafting a full dessert. Plus, they’re an excellent conversation starter when shared with friends or colleagues!
For those looking to impress their guests, a cannoli cookies recipe can be a showstopper. Imagine presenting a platter of these beautiful cookies, perhaps dusted with powdered sugar — who wouldn’t be intrigued?
Whether you’re a seasoned baker or a newbie, the beauty of these cookies lies in their simplicity. They combine the familiar comfort of cookies with the elaborate flavors of a classic Italian dessert. As you explore this recipe, let your creativity shine through by trying different fillings or toppings. After all, baking should be just as much about joy and discovery as it is about flavor!
Ready to bake? Let’s jump into the delicious details of making your very own cannoli cookies!
Ingredients for Cannoli Cookies
When it comes to making cannoli cookies, you’ll want to gather a selection of delightful ingredients that bring out the traditional Italian flavors. Here’s what you need for a fabulous batch of these treats:
- All-purpose flour: The base of your cookie, providing structure and balance.
- Granulated sugar: This will sweeten your cookies just perfectly.
- Butter: Choose unsalted for better control over flavor; it adds richness.
- Eggs: Vital for binding everything together. You can substitute with flaxseed if you’d like a vegan option.
- Ricotta cheese: The star ingredient! It gives your cookies that signature cannoli creaminess.
- Mini chocolate chips: These add an extra touch of sweetness and a fun little crunch.
- Powdered sugar: For the perfect dusting on top—definitely not optional!
- Cinnamon and vanilla extract: These warm spices will create an inviting aroma and enhance flavor.
For more baking tips, you might want to check out resources like the American Baker’s Association to elevate your cookie game!
Preparing Cannoli Cookies
Making cannoli cookies at home can be a delightful adventure. These cookies bring the classic Italian cannoli flavor in a fun, treat-sized package. Let’s walk through the process of preparing these delicious bites, ensuring every step is just right for the perfect result.
Gather and Prep Your Ingredients
First things first: you need to gather your ingredients. Here’s a list to get you started:
-
For the cookies:
-
Flour
-
Baking powder
-
Sugar
-
Butter
-
Eggs
-
Vanilla extract
-
Salt
-
For the filling:
-
Ricotta cheese
-
Powdered sugar
-
Chocolate chips
-
Zest of orange or lemon (your choice!)
-
Cinnamon (optional)
Make sure everything is fresh and ready to go. You can find detailed information on high-quality cocoa and dairy products over on websites like Food & Wine for ingredient selections that will enhance your cookie experience.
Create the Dough Mixture
Now, let’s dive into the fun part—the dough! In a large bowl, start by creaming together the butter and sugar until it’s fluffy. This aeration is crucial for a light texture. Next, add eggs one at a time, mixing well after each addition, while slowly adding in the vanilla extract.
In a separate bowl, whisk the dry ingredients (flour, baking powder, and salt) together. Gradually incorporate the dry mix into the wet mixture, stirring gently. You want a homogenous dough but avoid overmixing, as this can make your cookies tough.
Resting the Dough for Optimal Texture
Allow the dough to rest at room temperature or refrigerate it for about 30 minutes. This is an important step that enhances the flavors and helps the dough to firm up, making it easier to handle. It’s a great moment to clean up your workspace or enjoy a quick break with a hot cup of coffee.
Rolling Out and Cutting the Cookies
Once the dough has rested, flour your surface and roll it out to about 1/4 inch thickness. Use cookie cutters in your desired shapes—rounds work wonderfully for this cannoli cookies recipe. Ensure they’re evenly cut to promote even baking.
Mixing the Filling
While your cookies are baking, it’s time to whip up the delicious filling. In a bowl, combine the ricotta cheese, powdered sugar, and any flavorings you choose—like orange zest or cinnamon. Mix until smooth and well-combined. For an extra treat, fold in chocolate chips so each bite bursts with rich flavor.
Assembling and Sealing Your Cannoli Cookies
Once your cookies are cooled, it’s assembly time. Spoon a generous dollop of your filling onto the bottom of one cookie and gently press another on top to create a sandwich effect. For added sealing, consider lightly dusting the edges with powdered sugar.
Baking to Perfection
Preheat your oven to 350°F (175°C). Place your assembled cookies on a baking sheet lined with parchment paper. Depending on the size of your cookies, bake them for 10-12 minutes, or until they’re lightly golden. Keep an eye on them—the sweet aroma will let you know when they’re getting close.
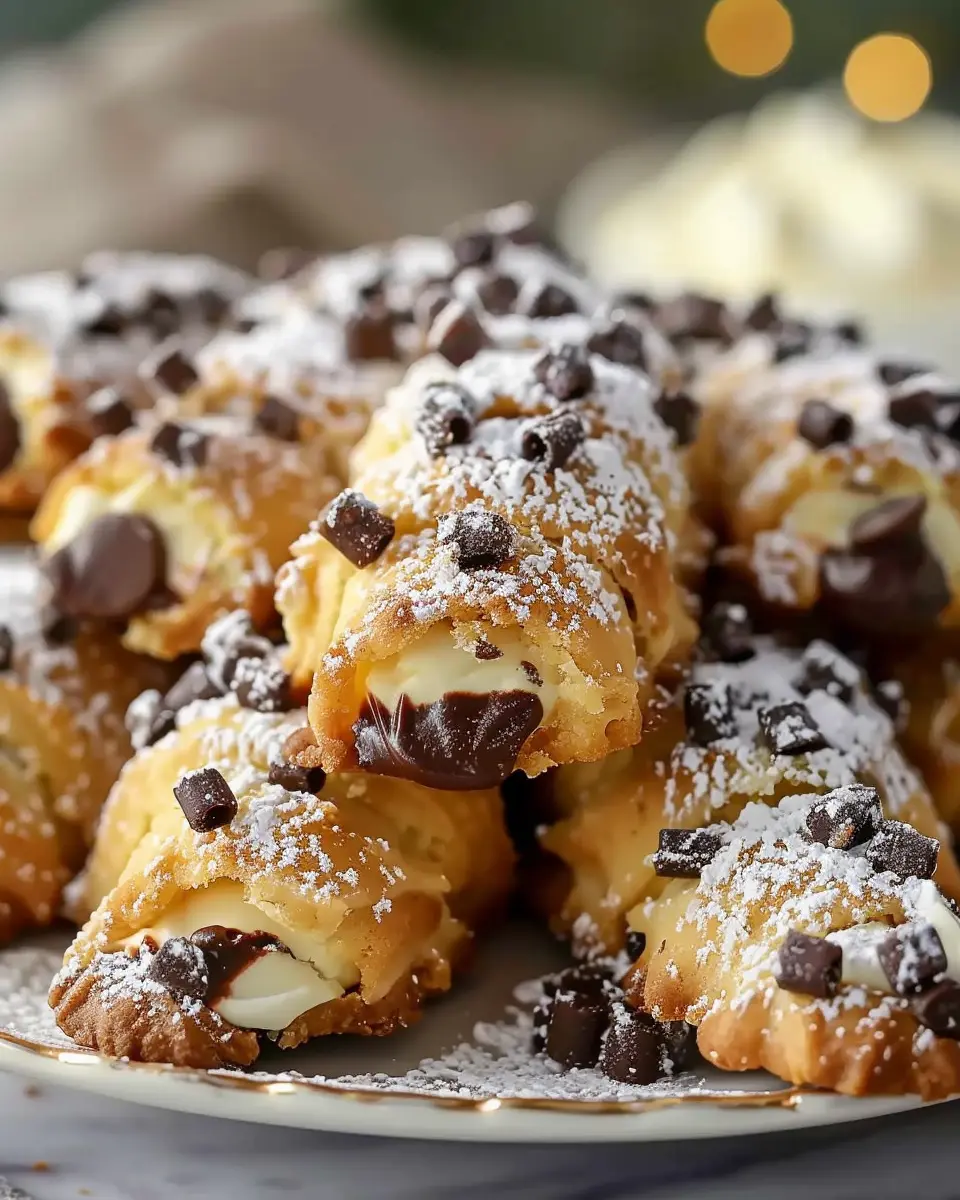
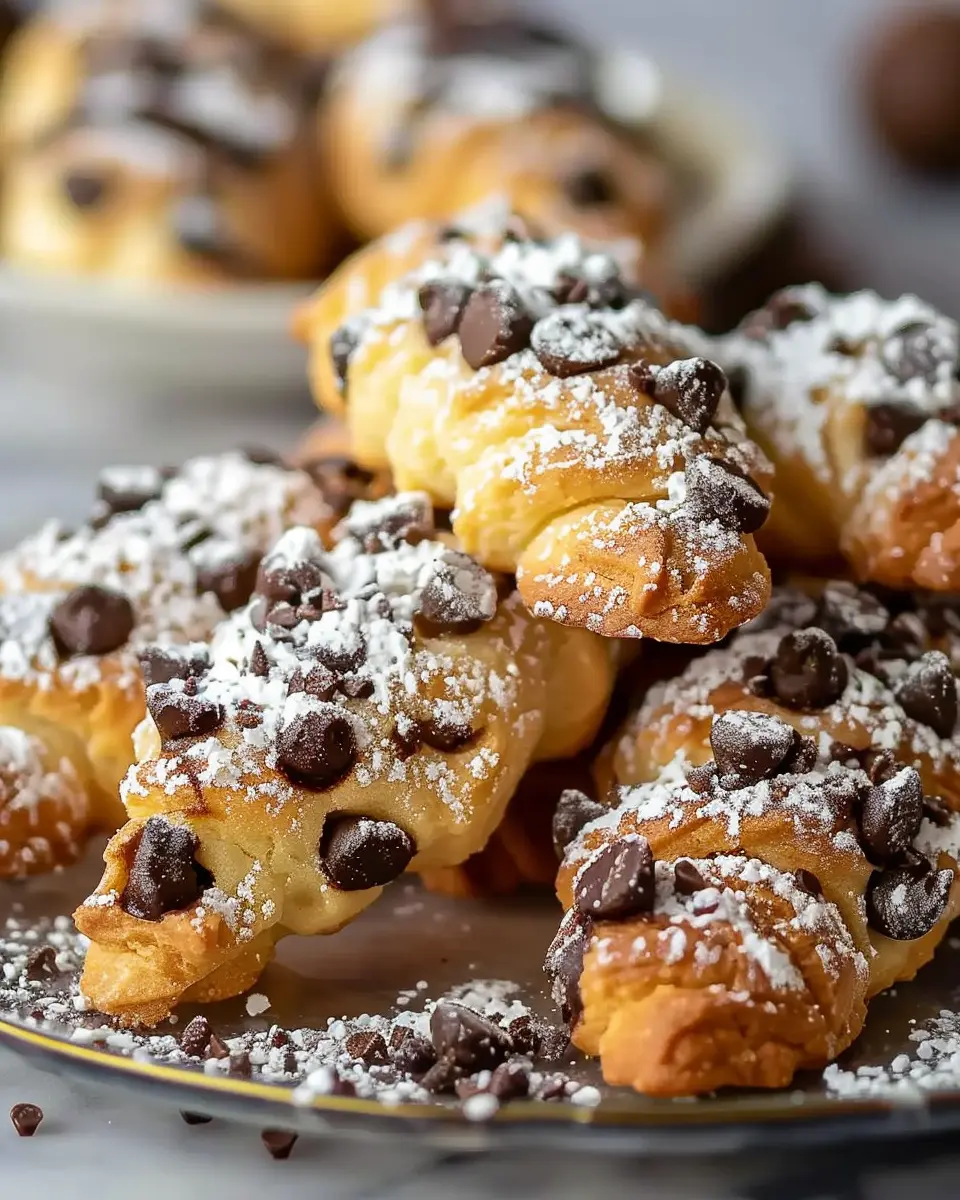
Cooling is also essential here. Leave the cookies on the baking sheet for a few minutes before transferring them to a wire rack. While they cool, you can drizzle them with melted chocolate or sprinkle with more powdered sugar for an extra touch.
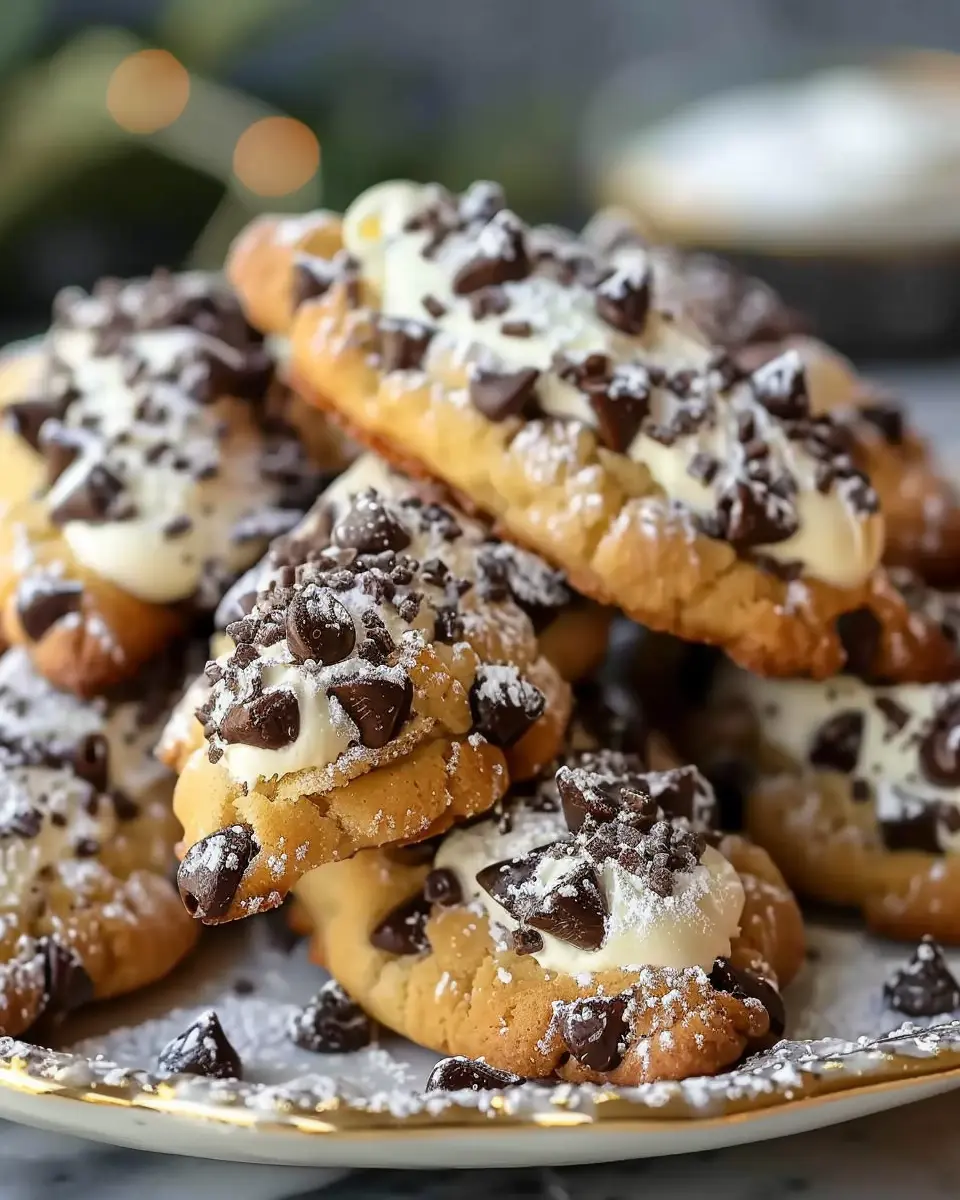
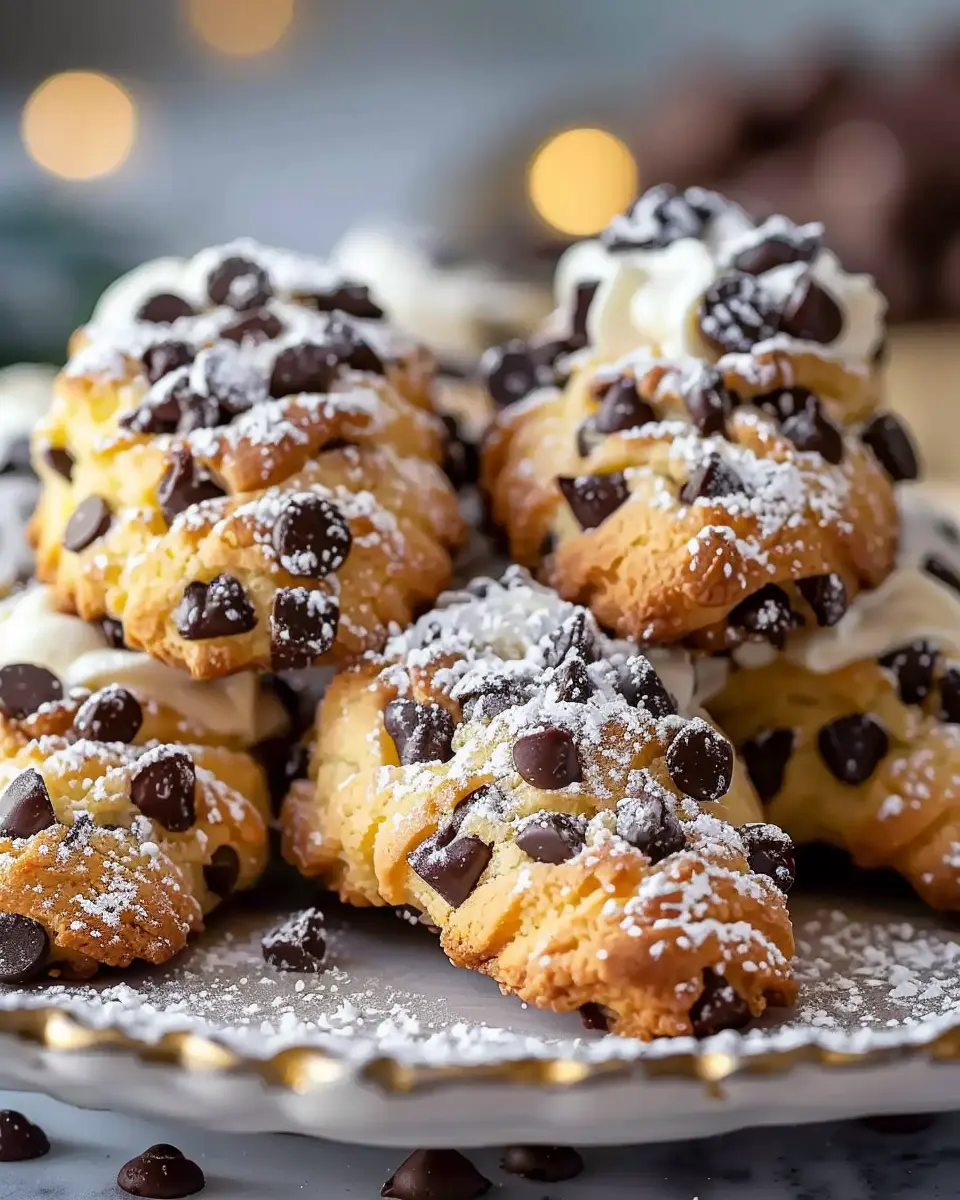
Enjoy crafting these delightful cannoli cookies! The combination of rich, sweet filling and buttery cookie creates a unique treat that will surely impress at any gathering. So, what are you waiting for? Let’s make some memorable moments with your friends and family through baking!
Variations on Cannoli Cookies
Cannoli cookies are a delightful twist on the classic Italian pastry, and there are so many exciting variations to explore! Let’s dive into some unique takes on this scrumptious cookie that will surely impress your friends and family.
Chocolate Chip Cannoli Cookies
Who can resist the charm of chocolate chips? These Chocolate Chip Cannoli Cookies combine the traditional flavors of cannoli with the beloved addition of chocolate. Just mix in a generous handful of semi-sweet chocolate chips into your dough, and watch how they melt into gooey perfection while baking. It’s a match made in heaven — creamy ricotta and rich chocolate create a delightful contrast that keeps you coming back for more.
Pistachio Cannoli Cookies
For those looking for a little nutty twist, consider Pistachio Cannoli Cookies. By adding crushed pistachios into your cookie dough, you introduce a wonderful crunch and earthy flavor that pairs beautifully with the sweet ricotta filling. Not only does this variation taste amazing, but it also gives your cookies a gorgeous green hue! Plus, pistachios are known for their health benefits, making this a guilt-free indulgence.
Gluten-free Cannoli Cookies
If you’re on a gluten-free diet, don’t fret! You can easily adapt the cannoli cookies recipe to suit your needs by substituting regular flour with a gluten-free blend. Many grocery stores offer excellent gluten-free flour options, or you might try almond flour for a nuttier flavor. Just be sure to keep an eye on the baking time, as gluten-free cookies can sometimes bake faster.
No matter which variation you choose, these delicious cannoli cookies are bound to be a hit. So, which one are you excited to try first? For more tips on gluten-free baking, check out Bob’s Red Mill.
Cooking Tips and Notes for Cannoli Cookies
Ensuring a Light and Airy Texture
For the best cannoli cookies recipe, achieving that delightful light and airy texture is crucial. Start by creaming the butter and sugar together until the mixture appears fluffy. This step introduces air into your dough, which translates to all-around deliciousness once baked. Remember, don’t over-mix after adding the dry ingredients; you want to maintain that airy quality. A gentle fold is all it takes to keep your cookies from becoming dense.
Importance of Mixing Ricotta Properly
When it comes to the filling, the way you mix your ricotta makes a world of difference. To avoid a lumpy texture, use a fine-mesh strainer to drain excess moisture from the ricotta; it’s a small but mighty step. Then, whip it with sugar and vanilla until smooth. This not only enhances the flavor but also ensures the ricotta blends seamlessly into your cookie dough. Not sure how to handle ricotta? You can find useful tips on Fine Cooking.
Following these tips can elevate your cannoli cookies recipe to new heights, impressing friends and family alike!
Serving suggestions for Cannoli Cookies
Perfect pairings for your cookies
Looking to elevate your cannoli cookies recipe? Think beyond just coffee! These delightful treats pair beautifully with:
- Espresso or drip coffee: The rich flavors of coffee enhance the chocolate chips and ricotta.
- Milk: Don’t underestimate the classic combo of milk with cookies! It adds a creamy contrast.
- Herbal tea: Give a light herbal tea a try for a refreshing twist that balances the sweetness.
And for those cozy evenings, consider adding some gelato or sorbet. A scoop of lemon or pistachio gelato will perfectly complement the flavors of the cookies.
Creative plating ideas
Presentation is key when serving up your cannoli cookies. Here are some fun and easy ideas:
- Stacked display: Layer your cookies on a beautiful cake stand. This creates a stunning centerpiece for any gathering.
- Dust with powdered sugar: A light sprinkle adds an elegant touch and enhances the visual appeal.
- Serve on colorful plates: Brightly colored or patterned plates can make your cookies pop and grab attention.
Combining these ideas not only makes for a more attractive dessert but also creates an inviting atmosphere for your guests. Happy baking!
Time breakdown for Cannoli Cookies
When planning your baking session, it’s essential to consider how much time each step will take. Here’s a quick overview for your cannoli cookies recipe:
Preparation time
Gather your ingredients and prepare for baking in about 20-25 minutes. You’ll want to create that perfect dough texture, which is key for delicious results.
Cooking time
Once your cookies are in the oven, they’ll need approximately 15-18 minutes to bake to golden perfection. Keep an eye on them — they can go from delightful to done in a flash!
Total time
Overall, you’re looking at roughly an hour from start to finish. This includes preparation and baking, making it a reasonably quick and satisfying bake. If you want more tips on cookie perfection, consider checking out this cookie baking guide.
Nutritional Facts for Cannoli Cookies
Calories Per Cookie
When you’re enjoying a delightful cannoli cookie, knowing the calorie count can be helpful. These cookies generally contain around 100 calories each. That makes them a lovely sweet treat without overwhelming your daily intake!
Key Nutrients
In addition to being tasty, cannoli cookies provide some essential nutrients. They typically offer:
- Carbohydrates: A quick source of energy.
- Proteins: Crucial for muscle repair and growth.
- Calcium: Beneficial for strong bones, especially if you add ricotta.
Not forgetting the taste, right?
Sugar and Fat Content
Now, let’s talk sweet—and a little indulgent. Each cookie usually has about 6g of sugar and 4g of fat. While you can’t overlook these numbers, enjoying them occasionally as part of a balanced diet is perfectly fine.
For precise nutritional breakdowns, consider checking out resources like the USDA FoodData Central or other well-respected nutritional databases. Enjoy baking your cannoli cookies recipe, and remember, moderation is key!
FAQs about Cannoli Cookies
Can I make these ahead of time?
Absolutely! The cannoli cookies recipe lends itself well to some pre-planning. You can prepare the cookie dough and refrigerate it for up to 24 hours before baking. If you want to go even further, bake the cookies ahead of time and store them for later. Just remember, the filling is best when freshly made. Consider whipping it up just before serving for that ideal creamy texture.
What modifications can I make for dietary restrictions?
Great question! There are plenty of ways to tweak this recipe to fit various dietary needs:
- Gluten-Free: Use a gluten-free all-purpose flour blend instead of regular flour.
- Dairy-Free: Substitute traditional ricotta with a dairy-free alternative or vegan cream cheese.
- Low-Sugar: Experiment with a sugar substitute or a natural sweetener like stevia to cut back on sugar.
- Nut-Free: If nuts are a concern, simply skip the pistachios or almonds as a garnish.
Make sure to keep an eye on the texture when making substitutions, as it can vary!
How do I store leftover Cannoli Cookies?
If you have some leftover cannoli cookies, store them in an airtight container at room temperature for up to three days. If you prefer, you can also freeze cookies without the filling for up to 3 months. When you’re ready to enjoy them again, just thaw and combine with the filling for a delightful treat!
For more detailed storage tips and insights, check out resources like the USDA’s food storage guidelines. Engaging in these practices ensures you savor every last bite of your mouthwatering cookies!
Conclusion on Cannoli Cookies
In conclusion, this cannoli cookies recipe is not just a treat; it’s an invitation to create memorable moments in your kitchen. Whether you give these cookies a twist with unique fillings or stick to the classic ricotta, the joy they bring is undeniable.
Share Your Thoughts or Variations!
Have you tried experimenting with different mix-ins, like nuts or chocolate chips? Perhaps a drizzle of honey or a dusting of cinnamon could elevate the experience. I’d love to hear how you make these cookies your own! Here’s a wonderful resource on cookie variations to explore more ideas. Happy baking!
PrintCannoli Cookies Recipe: Easy Indulgence for Homemade Treats
A delicious and easy recipe for Cannoli Cookies that brings the classic Italian treat into bite-sized, home-baked form.
- Prep Time: 15 minutes
- Cook Time: 15 minutes
- Total Time: 30 minutes
- Yield: 20 cookies
- Category: Dessert
- Method: baking
- Cuisine: Italian
- Diet: vegetarian
Ingredients
- 1 cup ricotta cheese
- 1 cup powdered sugar
- 2 cups all-purpose flour
- 1/2 cup unsalted butter
- 1 teaspoon vanilla extract
- 1 teaspoon ground cinnamon
- 1/2 cup mini chocolate chips
Instructions
- Preheat the oven to 350°F (175°C).
- In a large bowl, cream together the softened butter and sugar until light and fluffy.
- Add the ricotta cheese, vanilla extract, and mix well.
- In a separate bowl, combine the flour, cinnamon, and chocolate chips.
- Gradually add the dry ingredients to the wet mixture, stirring until combined.
- Drop spoonfuls of the batter onto a baking sheet lined with parchment paper.
- Bake for 12-15 minutes or until lightly golden.
- Allow to cool before serving.
Notes
- For extra flavor, add a sprinkle of orange zest to the batter.
- Serve with a dusting of powdered sugar on top.
Nutrition
- Serving Size: 1 cookie
- Calories: 150
- Sugar: 10g
- Sodium: 50mg
- Fat: 5g
- Saturated Fat: 3g
- Unsaturated Fat: 2g
- Trans Fat: 0g
- Carbohydrates: 22g
- Fiber: 1g
- Protein: 2g
- Cholesterol: 15mg