Outline for Cannoli Bars
Introduction to Cannoli Bars
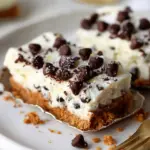
If you’re searching for a delightful and easy dessert that captures the essence of tradition while adding a modern twist, look no further than cannoli bars. This delightful creation takes the classic Italian pastry—cannoli—and transforms it into a manageable, shareable form that will dazzle your taste buds. With a creamy filling reminiscent of traditional cannoli, a delectable crust, and a host of toppings to choose from, cannoli bars offer a perfect blend of flavors and textures.
The allure of these bars lies not just in their taste but also in their versatility. Imagine a dessert that you can whip up in a relatively short amount of time, especially on a busy weekday or during festive gatherings. Cannoli bars can be made ahead, making them an ideal choice for those looking to simplify their dessert preparations without sacrificing richness and enjoyment.
The journey of cannoli from a notoriously intricate pastry to the simple elegance of cannoli bars is fascinating. Historically, cannoli have roots in Italy, specifically Sicily, dating back to the 9th century. Originally enjoyed as a celebratory dessert during festivals, these crispy pastry tubes filled with ricotta cheese slowly captured hearts across various cultures, evolving in many ways to meet the ever-changing palate of dessert lovers. The inventive spirit of modern cooking led to the development of cannoli bars, which are not only easier to make but also cater to individuals looking for a comforting dessert that can be enjoyed in more casual settings.
The rise of no-bake desserts has played a significant role in popularizing treats like cannoli bars. As home cooks and bakers increasingly seek convenience without compromising on taste, recipes that minimize or eliminate baking have surged in popularity. Cannoli bars, with their no-bake crust and creamy filling, fit beautifully into this trend, making them a fantastic option for today’s busy lifestyle.
Ingredients for Cannoli Bars
Creating irresistible cannoli bars starts with assembling the right ingredients. Here’s a quick run-through of what you’ll need:
Essential ingredients for the crust
- Graham cracker crumbs: These create a sweet and crunchy base.
- Butter: Adds richness and helps bind the crumbs together.
- Sugar: A touch of sweetness to balance the flavors.
Key ingredients for the cheesecake filling
- Ricotta cheese: The star of the filling, it delivers the signature cannoli taste.
- Cream cheese: Adds creaminess and depth to the flavor.
- Powdered sugar: Sweetens the mixture while keeping the texture smooth.
- Vanilla extract: Enhances the overall flavor profile.
Optional toppings and variations
- Mini chocolate chips: Perfect for adding bursts of chocolatey goodness.
- Chopped nuts: Provides a nice crunch and elevates the presentation.
- Citrus zest: A zesty addition to brighten the flavors.
With these simple yet essential ingredients, you’re well on your way to crafting delightful cannoli bars that will leave everyone asking for more.
Preparing Cannoli Bars
Creating homemade cannoli bars is a gratifying adventure! Let’s break it down into easy, manageable steps:
Step 1: Preparing the crust
- Preheat your oven (if applicable): If your recipe includes baking the crust, preheat your oven to 350°F (175°C).
- Mix graham cracker crumbs and sugar: In a medium bowl, combine melted butter, graham cracker crumbs, and sugar until fully blended.
- Form the crust: Press the mixture firmly into the bottom of a greased 8×8-inch baking dish to form a solid foundation.
Step 2: Mixing the cannoli cheesecake filling
- Beat the cream cheese: In a large mixing bowl, blend the cream cheese until smooth and creamy.
- Add ricotta cheese and sugar: Mix in ricotta, powdered sugar, and vanilla extract until well combined and creamy. Take care not to overbeat the mixture to prevent it from becoming too airy.
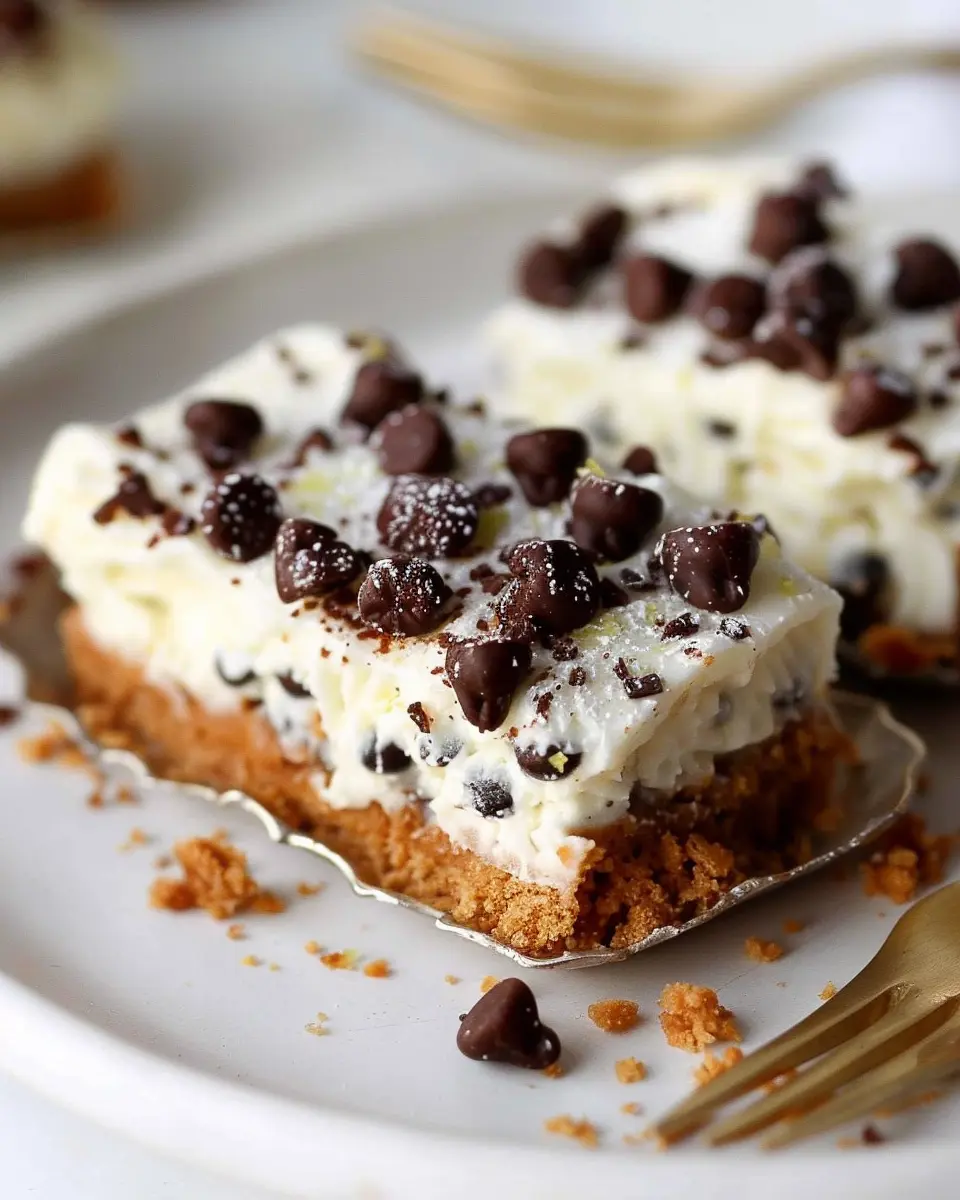
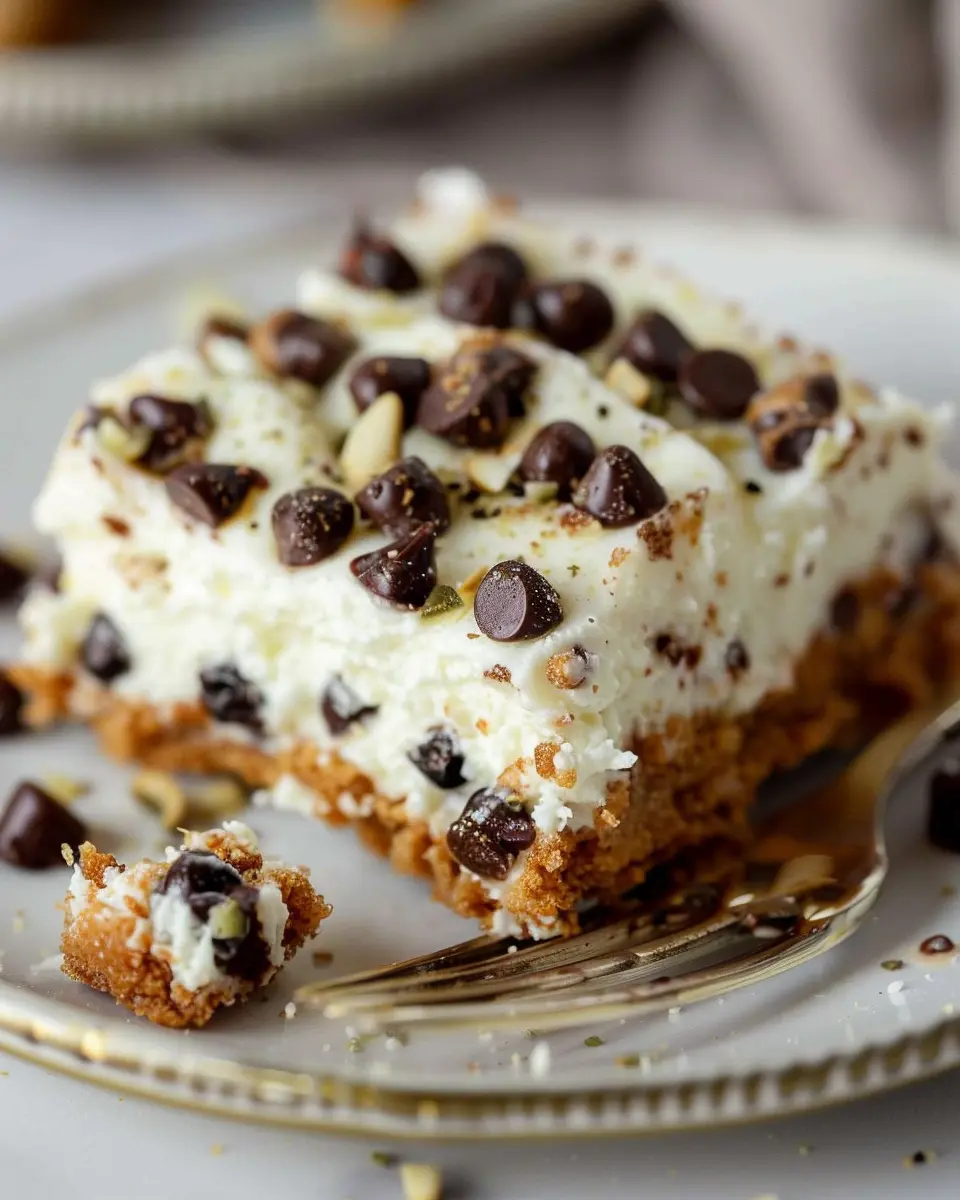
- Fold in chocolate chips or other additions: Gently incorporate mini chocolate chips or other desired toppings for that delightful texture and flavor.
Step 3: Assembling the cannoli bars
- Layer the filling: Spread the cheesecake filling over the crust, smoothing it evenly.
- Add toppings: If desired, sprinkle additional chocolate chips or nuts over the top for extra flair.
Step 4: Chilling and setting the bars
- Chill: Cover the dish with plastic wrap and refrigerate for 4-6 hours, allowing the bars to firm up.
- Check consistency: The filling should be set when you’re ready to slice.
Step 5: Cutting and serving tips
- Cut into bars: Use a sharp knife for even slicing. A hot knife (dipped in hot water and wiped dry) can make this easier.
- Serve chilled: Enjoy your delicious cannoli bars straight from the fridge!
Variations on Cannoli Bars
If you’re feeling adventurous, there are plenty of creative spins on classic cannoli bars that can elevate your dessert experience:
- Chocolate cannoli bars: Incorporate cocoa powder into the crust or filling for a decadent chocolate version that will please any chocolate lover.
- Fruit-infused cannoli bars: Add pureed strawberries or lemon zest to the filling for a fruity twist. Peach or raspberry also works wonderfully!
- Gluten-free or vegan options: Swap out graham crackers for gluten-free cookies and use dairy-free cream cheese and ricotta for a delicious vegan version without compromising on flavor.
Cooking Tips and Notes for Cannoli Bars
Creating cannoli bars can be quite simple with a few tried-and-true tips:
- Tips for achieving the perfect crust: Ensure your butter is melted but not too hot, as this can cause the crumbs to clump. Press the mixture firmly into the dish to create a sturdy base.
- How to avoid a lumpy filling: Make sure both cheeses are at room temperature to blend smoothly. Avoid overmixing to keep the filling creamy, while still ensuring all ingredients are well combined.
- Storage tips for leftovers: Store your cannoli bars in an airtight container in the fridge for up to one week. They can also be frozen for up to three months—just thaw before serving!
Serving Suggestions for Cannoli Bars
Enhance the enjoyment of your cannoli bars with these serving suggestions:
- Ideal pairings for beverages: Pair your bars with rich coffee, a refreshing iced tea, or even a homemade frappuccino for a delightful afternoon treat.
- Creative serving ideas for parties: Cut the bars into bite-sized pieces and arrange them on a beautiful platter. Garnish with whipped cream, fresh berries, or a drizzle of chocolate sauce for an eye-catching dessert display.
Time Breakdown for Cannoli Bars
Knowing how to manage your time can make a significant difference in your cooking experience. Here’s a handy time breakdown for preparing your cannoli bars:
- Preparation time: 30 minutes to mix, prepare, and layer your bars.
- Chill time: A good few hours—at least 4-6 hours is ideal for the filling to set perfectly.
- Total time: Approximately 5-6 hours to enjoy these delicious treats from start to finish.
Nutritional Information for Cannoli Bars
Keeping track of nutritional values can help in maintaining a balanced diet. On average, a serving of cannoli bars (about 1/12 of the dish) contains:
- Calories: Approximately 270 calories
- Protein: Around 4 grams
- Sodium: Roughly 120 mg
FAQs about Cannoli Bars
Here are a few common queries regarding cannoli bars that might help enhance your baking experience:
- How do I prevent the crust from being soggy?: Always ensure your butter and crust mixture are well combined and pressed firmly into the dish. Baking the crust briefly before adding the filling can also help preserve its texture.
- Can I make cannoli bars in advance?: Absolutely! They can be prepared and stored in the fridge for a few days in advance, making them perfect for gatherings or special occasions.
- What are the best toppings for cannoli bars?: While chocolate chips are a classic, feel free to explore toppings like crushed pistachios, shredded coconut, or even a sprinkle of cinnamon for an added flavor burst.
Conclusion on Cannoli Bars
Making your own cannoli bars is not only rewarding but also offers an avenue to enjoy a beloved Italian treat in a more approachable form. With rich flavors, a wonderful texture, and the flexibility to customize, these bars can quickly become a staple in your dessert repertoire. So grab your ingredients, gather your friends, and dive into the world of cannoli bars—you won’t regret it!
Cannoli Bars: Easy Indulgent Treats for Homemade Dessert Lovers
Cannoli Bars are the perfect blend of creamy filling and crispy crust, ideal for dessert lovers looking for an easy homemade treat.
- Prep Time: 15 minutes
- Cook Time: 30 minutes
- Total Time: 45 minutes
- Yield: 12 servings
- Category: Dessert
- Method: Baking
- Cuisine: Italian
- Diet: Vegetarian
Ingredients
- 1 cup ricotta cheese
- 1 cup mascarpone cheese
- 1/2 cup powdered sugar
- 1 teaspoon vanilla extract
- 1/2 cup mini chocolate chips
- 1 package cookie dough
Instructions
- Preheat your oven to 350°F (175°C).
- In a bowl, mix ricotta, mascarpone, powdered sugar, and vanilla extract until smooth.
- Fold in mini chocolate chips.
- Spread cookie dough in a baking dish, then layer the cheese mixture on top.
- Bake for about 25-30 minutes or until golden.
- Let cool, then cut into bars and serve.
Notes
- For a firmer filling, refrigerate bars before serving.
Nutrition
- Serving Size: 1 bar
- Calories: 250
- Sugar: 10g
- Sodium: 150mg
- Fat: 12g
- Saturated Fat: 7g
- Unsaturated Fat: 3g
- Trans Fat: 0g
- Carbohydrates: 30g
- Fiber: 1g
- Protein: 4g
- Cholesterol: 50mg