Introduction to Grilled Cheese Roll-Ups
If you grew up in the U.S., there’s a good chance grilled cheese sandwiches were a staple in your childhood. The comforting aroma of melted cheese, golden-brown bread, and nostalgia is something many of us cherish. But what if I told you there’s a way to revitalize this classic comfort food? Enter grilled cheese roll-ups—a simple yet innovative twist on the traditional recipe that will quickly become a favorite for both kids and adults alike.
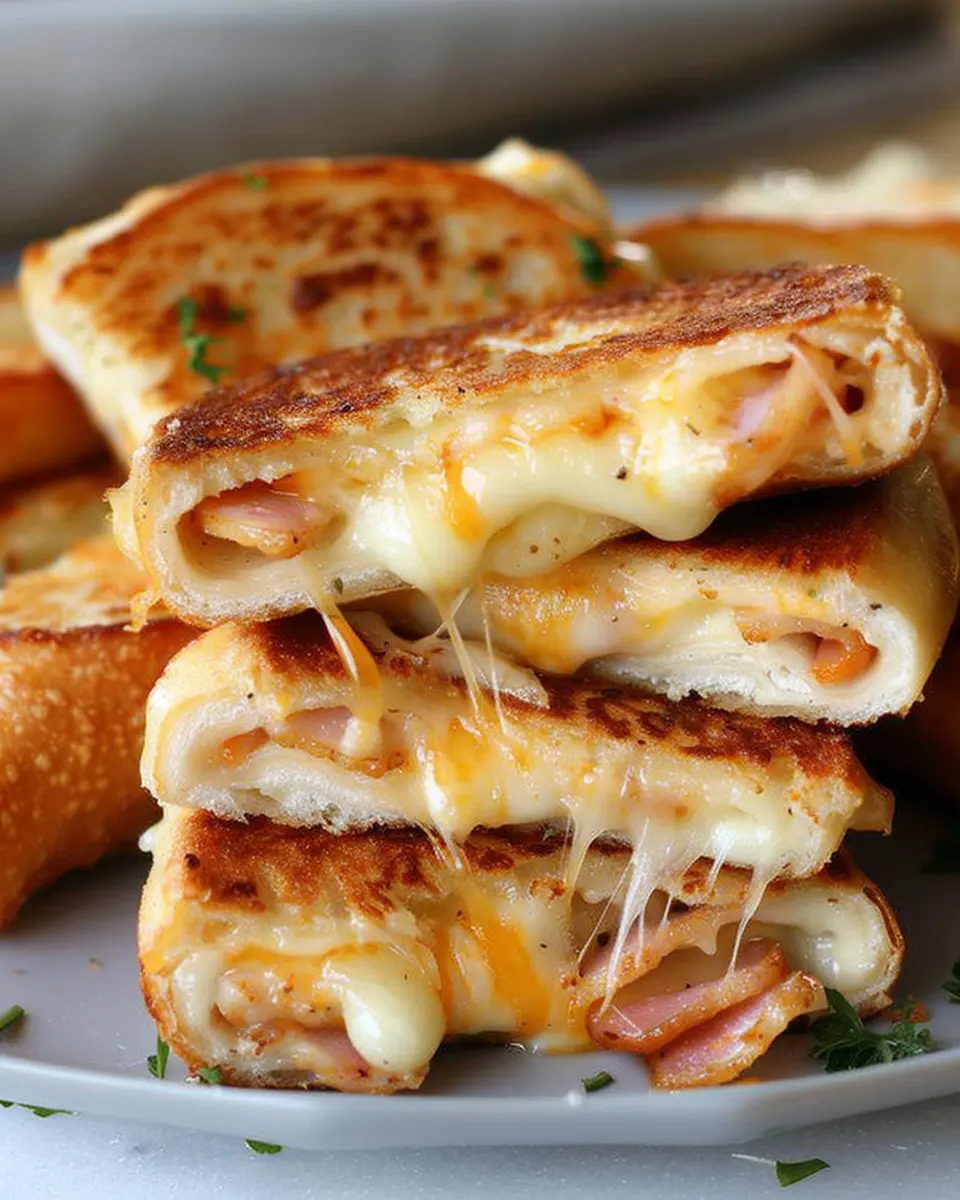
These delightful roll-ups take all the gooey, cheesy goodness of a classic grilled cheese and transform it into a fun, portable treat. Perfect for a quick snack or a child-friendly meal, grilled cheese roll-ups make cheese the star of the show, allowing you to enjoy that crispy exterior and rich flavor in a new format.
Think about it: with roll-ups, you can easily customize with ingredients like turkey bacon or chicken ham for an added protein punch. You can even toss in some vibrant veggies, like spinach or peppers, for a nutritious boost! Many parents are looking for ways to sneak more vegetables into their kids’ diets, and this is a tasty solution that kids will actually want to eat. Interested in more recipe ideation? Take a look at these creative options from Food Network for inspiration!
For busy professionals, the flexibility of grilled cheese roll-ups can’t be overstated. They are quick and easy to whip up, making them an ideal choice for lunch breaks or casual gatherings. Did you know that nearly 44% of people enjoy rich, melted cheese as their favorite comfort food? Research shows that accustomed flavors can create a sense of well-being, making grilled cheese roll-ups not just tasty but also therapeutic.
Whether you’re reminiscing about a childhood favorite or seeking a new way to enjoy your meals, these grilled cheese roll-ups are a game changer that everyone will love. So grab some bread, cheese, and your favorite fillings—it’s time to take your grilled cheese experience to the next level!
Ingredients for Grilled Cheese Roll-Ups
Essential ingredients for a cheesy delight
To whip up scrumptious grilled cheese roll-ups, you’ll need a handful of simple yet delightful ingredients. Here’s what you’ll typically gather:
- Bread: White, whole wheat, or sourdough are great options. Choose thicker slices for easier rolling.
- Cheese: Go for a melty masterpiece with cheeses like cheddar, mozzarella, or a combo of both for an irresistible gooey experience.
- Turkey Bacon or Chicken Ham: These add a savory twist; use them for some protein-packed goodness inside your roll-ups.
- Butter: Don’t skimp! This is crucial for perfectly crisping those delectable roll-ups on the skillet.
Optional add-ins for an elevated flavor experience
Ready to take your grilled cheese roll-ups to the next level? Consider these tasty add-ins:
- Fresh herbs: Basil or oregano can elevate your flavor profile.
- Avocado slices: Creamy and nutritious, they add a wonderful texture.
- Sautéed veggies: Spinach or mushrooms can bring a unique touch to your roll-ups.
- Dipping sauces: Try marinara or a tangy dipping sauce to complement each bite.
Feel free to mix and match—this is your chance to get creative! For more ideas on fun variations, check out this great source on grilled cheese variations.
Step-by-step Preparation of Grilled Cheese Roll-Ups
Creating the ultimate comfort food often starts with a simple idea and a few basic ingredients. Grilled cheese roll-ups provide a delicious twist on the beloved classic, perfect for lunch, dinner, or a late-night snack. With a crunchy exterior and gooey center, these roll-ups are sure to impress. Let’s dive into the step-by-step preparation.
Gather your ingredients
Before you start cooking, make sure you have all your ingredients ready. This makes the process smoother and ensures you won’t have to scramble for anything halfway through. Here’s what you’ll need:
- Bread: Choose white, whole wheat, or sourdough, depending on your preference.
- Cheese: Opt for a mix of your favorites — cheddar, mozzarella, or pepper jack work beautifully.
- Turkey Bacon or Chicken Ham (optional): These add a great savory flavor; choose based on what you have on hand.
- Butter: For that perfect crispy finish.
- Condiments (optional): Ketchup, ranch, or even mustard can elevate the dish.
Once you’ve gathered these essentials, you’ll be all set to create something delicious!
Prepare the bread
Next up: preparing the bread. This step is essential to ensure your grilled cheese roll-ups hold together well and have the perfect texture.
- Flatten the Bread: Use a rolling pin to gently roll each slice of bread until it’s about 1/4 inch thick. This creates a great base for rolling.
- Trim the Crusts: Removing the crusts is optional, but it can help create a cleaner roll and enhance presentation. Plus, it makes it easier for younger eaters to enjoy!
Flattening the bread not only helps the flavors meld better, but it also makes rolling easy and fun.
Assemble the roll-ups
Now, for the fun part: assembly! This is where you can get creative with your grilled cheese roll-ups.
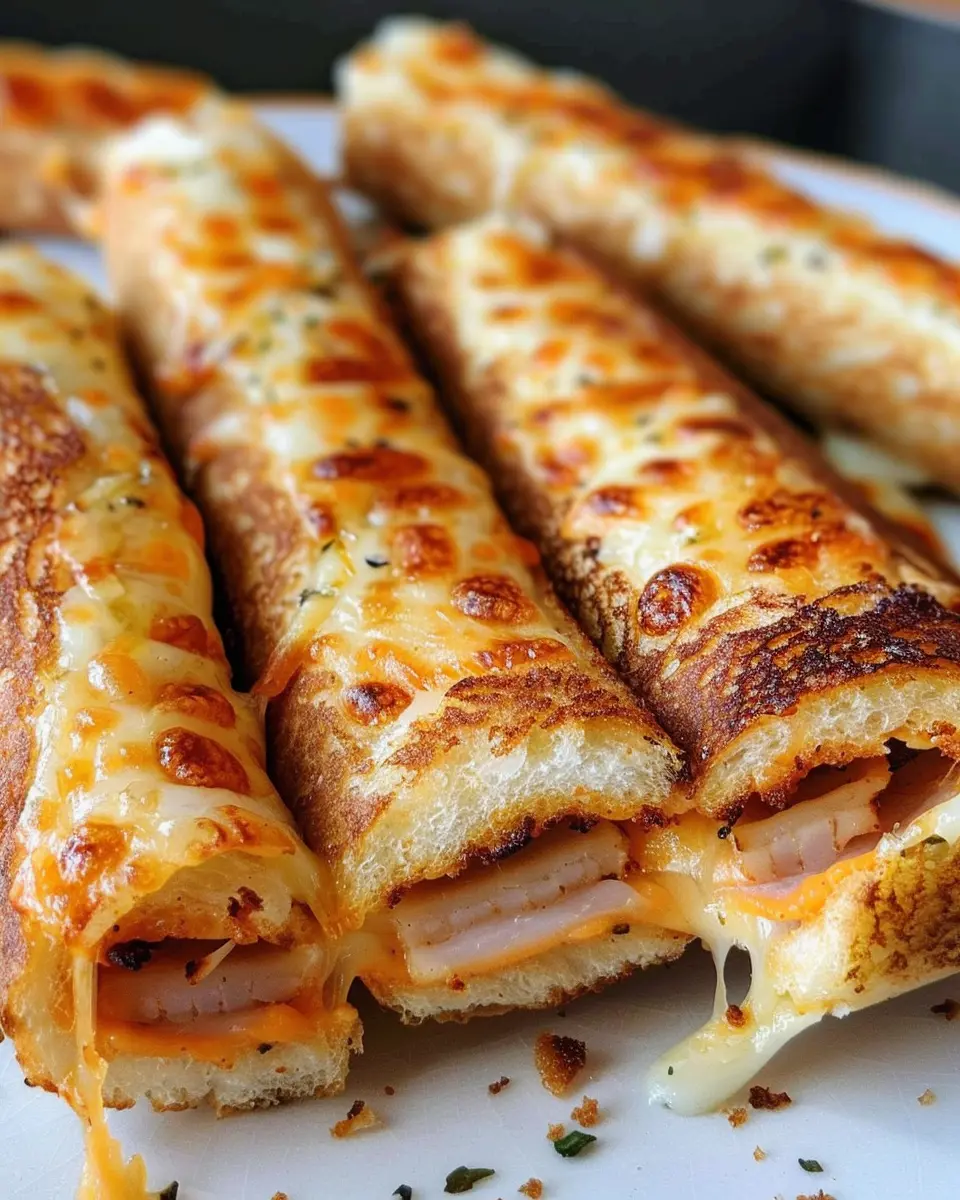
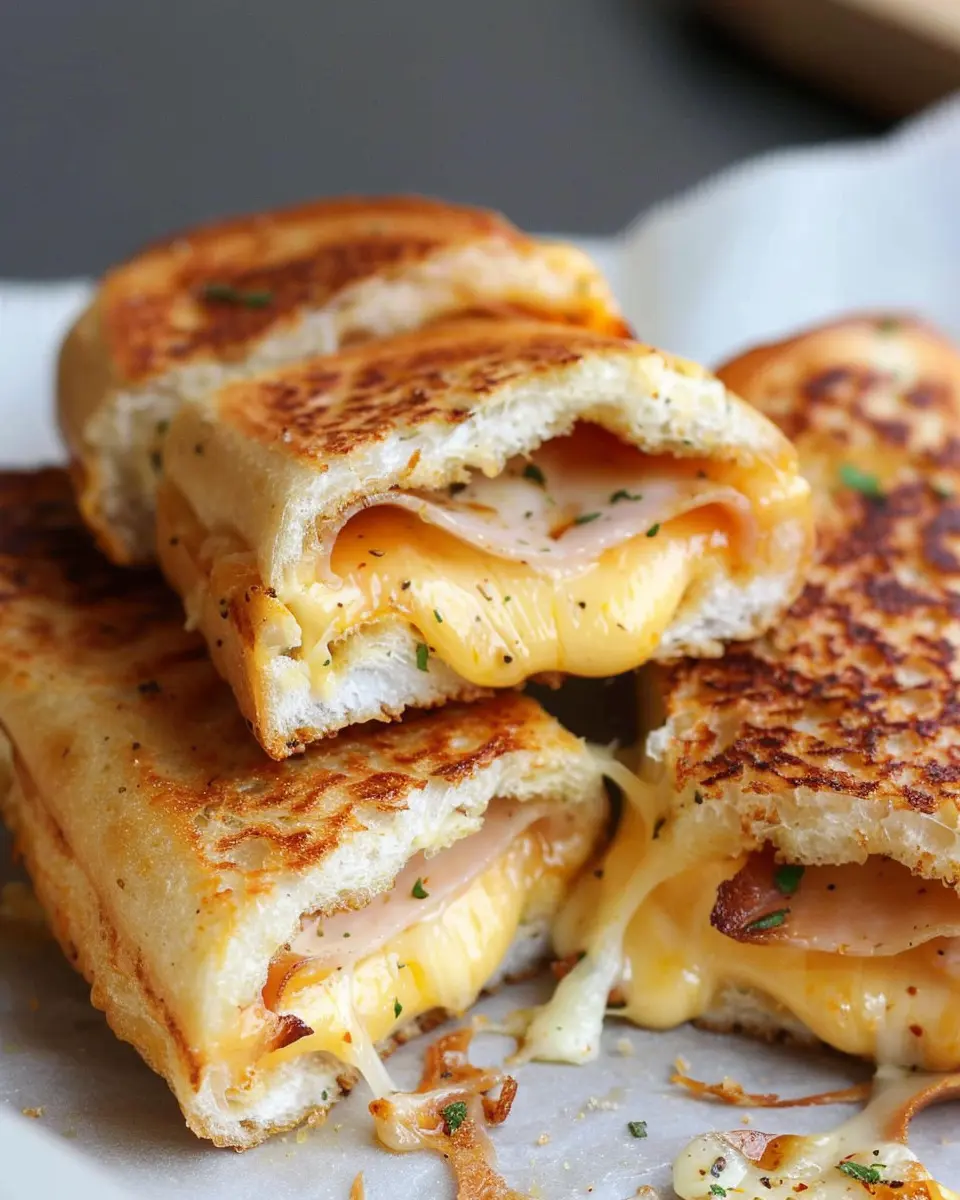
- Cheese Placement: Lay a slice of your chosen cheese (or a blend) onto the flattened bread. If you’re adding turkey bacon or chicken ham, layer that on top of the cheese.
- Roll It Up: Starting from one end, carefully roll the bread tightly but gently. This ensures that the cheese doesn’t leak out while cooking.
- Secure the Roll: You can use a toothpick to secure the roll if needed, but be sure to remove it before serving.
With layers of cheese and savory additions, your roll-ups will be mouthwatering even before they hit the pan!
Cook to golden perfection
Now that your roll-ups are assembled, it’s time to cook them to crispy perfection.
- Heat the Pan: On medium heat, add a generous amount of butter to your skillet. This will give your roll-ups that golden, crispy texture we all crave.
- Cook the Roll-Ups: Place your roll-ups seam-side down in the skillet. Cook for about 2-3 minutes on each side or until they are golden brown and the cheese has melted inside. A good rule of thumb is to listen for that satisfying sizzle.
- Tip for Extra Crispiness: If you want an extra crispy result, consider adding a sprinkle of parmesan cheese to the pan before placing the roll-ups down.
Cooking them to perfection is crucial—wasting delightful ingredients would be a culinary tragedy!
Serve and enjoy
Finally, the moment you’ve been waiting for. Plate your grilled cheese roll-ups, and whatever you do, don’t forget the dipping sauces! Set out some bowls of ketchup, ranch dressing, or a spicy mustard for a fun twist.
These roll-ups not only look great but also invite a sharing vibe — making them perfect for gatherings or cozy nights in. Share them, snap a picture for your social media, and let your friends know about this delightful recipe.
Now, isn’t it time to treat yourself to some homemade deliciousness? Enjoy every gooey, cheesy bite!
Variations on Grilled Cheese Roll-Ups
Grilled cheese roll-ups are a delightful twist on the classic sandwich, perfect for any occasion. Not only are they fun to make, but they’re also incredibly versatile! Let’s delve into some tasty variations that can elevate your roll-up experience.
Classic Grilled Cheese Roll-Ups
There’s something about the simple combination of gooey cheese and buttery bread that feels like home. For the classic version, simply take whole slices of bread, flatten them with a rolling pin, and fill them with your favorite cheese—think cheddar, mozzarella, or a melty blend. After you’ve rolled them up and cooked them to golden perfection, serve them with a side of tomato soup for that ultimate comfort food experience.
Grilled Cheese Roll-Ups with Chicken Ham
Why stop at just cheese? For a protein-packed twist, try adding chicken ham to your grilled cheese roll-ups. Layer in thin slices of chicken ham with the cheese before rolling, then grill them until the cheese melts and the bread turns crunchy. This variation not only enhances the flavor but also makes your snack a bit heartier.
Creative Roll-Ups with Different Cheeses and Spices
For a gourmet touch, don’t hesitate to experiment! Mix and match different cheeses like pepper jack for a spicy kick or goat cheese for a tangy flavor. Spice things up with garlic powder, crushed red pepper, or even a sprinkle of Italian herbs. You could also dip your roll-ups in a spicy marinara sauce for an added layer of flavor.
With these variations, your grilled cheese roll-ups can be as creative as your imagination allows. Whether you’re crafting a cozy meal for yourself or impressing friends at a gathering, these roll-ups just might become your new go-to snack!
Feeling adventurous? Check out The Kitchn for even more delicious grilled cheese ideas!
Cooking Tips and Notes for Grilled Cheese Roll-Ups
Perfect heat settings for the ideal crispiness
To achieve that golden-brown, crispy perfection for your grilled cheese roll-ups, medium heat is your best friend. It allows the cheese to melt beautifully without burning the bread. It’s a good idea to preheat your skillet for a few minutes before adding your roll-ups. If you’re using a non-stick skillet or a well-seasoned cast iron, you might find that just a touch of butter or oil enhances the flavor while giving a fantastic crunch.
How to avoid soggy roll-ups
Keep your grilled cheese roll-ups from turning soggy by ensuring the bread is dry enough before rolling. Lightly toast your bread before adding cheese and fillings, or use day-old bread, which has less moisture. Also, be mindful of the fillings—excessive ingredients can lead to sogginess, so stick with a single layer of cheese and a small amount of turkey bacon or chicken ham for a perfect balance.
Storing and reheating tips
If you end up with leftovers (though they’re hard to resist!), store your grilled cheese roll-ups in an airtight container in the refrigerator for up to three days. When reheating, an air fryer or skillet works wonders to restore their original crispiness. Avoid the microwave, as it tends to make them soggy. Just heat them over medium-low heat for a few minutes, flipping them until they’re warmed through, and enjoy that freshly made crunch all over again!
For more tips on maximizing flavor in quick meals, check out this great resource on cooking techniques.

Serving Suggestions for Grilled Cheese Roll-Ups
Pairing with Dips and Sauces
When it comes to grilled cheese roll-ups, the right dip or sauce can take your snack game to a whole new level. Think about rich and creamy options like:
- Spicy Marinara: The kick from the spices works perfectly with gooey cheese.
- Garlic Aioli: Elevating the flavor with a smooth, garlicky touch.
- Mustard Greens: A tangy kick that complements the savory richness well.
Mix and match these dips for a fun taste testing experience—why not host a mini tasting party?
Creative Plating Ideas
Make your grilled cheese roll-ups visually appealing! Presenting your dish in a delightful way can enhance the dining experience. Simple tips include:
- Skewered: Thread the roll-ups on a toothpick for a fun finger food option.
- On a Charcuterie Board: Pair with olives, cherry tomatoes, and turkey bacon for a colorful spread.
- Stacked: Layer the roll-ups with small plates and sprinkle herbs on top for that gourmet touch.
For more ideas on entertaining and food presentation, check out this article on plating techniques. Your friends will be impressed, and you may even want to snap a few photos for your social media!
Time Breakdown for Grilled Cheese Roll-Ups
Preparation Time
Getting started with your grilled cheese roll-ups is a breeze! You’ll need about 10 minutes to gather your ingredients and prep your workspace. Make sure you have everything on hand: bread, cheese, and your choice of fillings like turkey bacon or chicken ham.
Cooking Time
Once prepped, the cooking is quick and deliciously rewarding. Aim for around 5-7 minutes to cook each batch, ensuring that golden perfection is achieved while the cheese melts beautifully.
Total Time
In total, you’re looking at roughly 15-20 minutes from start to finish for your grilled cheese roll-ups. Perfect for a busy weeknight dinner or a tasty snack during a binge-watching session! Feeling inspired? Check out The Kitchn for more quick meal ideas.
Nutritional Facts for Grilled Cheese Roll-Ups
When it comes to grilled cheese roll-ups, it’s easy to overlook the nutritional facts, but these tasty bites can fit into a balanced diet if enjoyed in moderation. Let’s break down the main stats:
Calories per serving
Each serving of grilled cheese roll-ups typically contains around 250–300 calories. This makes them a satisfyingly indulgent snack or a light meal option that won’t break the calorie bank.
Protein content
These roll-ups provide a decent protein boost, with approximately 10–12 grams per serving. The combination of cheese and the optional turkey bacon or chicken ham can help keep you feeling full and satisfied.
Sodium levels
Be mindful of sodium, as each serving can pack about 500–700 mg of sodium. If you’re watching your salt intake, consider using low-sodium cheese and skipping additional seasonings.
For more detailed nutrition insights, you might find the USDA’s FoodData Central a handy resource! These grilled cheese roll-ups reign as a beloved favorite, especially when customized to suit your taste and dietary needs. Do you have a go-to twist?
FAQs about Grilled Cheese Roll-Ups
Can I make these ahead of time?
Absolutely! Grilled cheese roll-ups are perfect for meal prepping. You can prepare them in advance, fill them with your favorite cheeses, and store them in the refrigerator for up to 24 hours. Just remember to wrap them tightly in plastic wrap or place them in an airtight container to keep them fresh. When you’re ready to enjoy, simply toss them in the skillet or oven until they’re heated through and crispy.
What other fillings work well?
While the classic cheese is a surefire hit, feel free to get creative with your fillings! Here are some tasty alternatives to try:
- Spinach and Feta: Adds a burst of flavor and nutrition.
- Turkey Bacon: For that perfect savory bite.
- Chicken Ham: If you’re looking for a protein boost.
- Pesto and Mozzarella: A delightful Mediterranean twist.
- Tomato and Basil: Ideal for a fresh, summery taste.
These combinations can elevate your grilled cheese roll-ups and keep things interesting.
How do I keep them crispy?
To achieve that perfect crunch, there are a few tricks you can implement:
- Use butter: Spread a thin layer of butter on the outside of the roll-ups before cooking. This helps in achieving that golden-brown crust.
- Don’t overcrowd the pan: Give each roll-up enough space to breathe while cooking; this ensures even crisping.
- Bake them: After pan-frying, let them rest in a preheated oven at 350°F for a few minutes. This not only keeps them crispy but also warms them thoroughly.
By following these tips, you’ll be able to serve up delightful grilled cheese roll-ups that are both delicious and visually appealing.
For more tips on meal prep and creative cooking, check out this useful resource on meal prepping or explore cheese varieties to diversify your fillings!
Conclusion on Grilled Cheese Roll-Ups
Recap of the joys of making grilled cheese roll-ups
Making grilled cheese roll-ups is a delightful culinary adventure that combines the fun of an interactive cooking experience with the comforting flavors of classic grilled cheese. These roll-ups offer a creative twist, showcasing gooey cheese and crispy bread in a portable form.
Whether you opt for a traditional flavor or experiment with add-ins like Turkey Bacon or Chicken Ham, the possibilities are endless. Plus, they’re quick to make, making them a perfect snack or an easy meal for busy young professionals. You’ll find that not only are they delicious, but they also bring a sense of joy to the kitchen. So why not gather your ingredients and enjoy a little cooking magic tonight? For more fun spin on classic dishes, check out BBC Good Food for some inspiration!
PrintGrilled Cheese Roll-Ups: Easy Delight with Turkey Bacon and Chicken Ham

Enjoy a delicious twist on a classic with these Grilled Cheese Roll-Ups featuring turkey bacon and chicken ham!
- Prep Time: 10 minutes
- Cook Time: 5 minutes
- Total Time: 15 minutes
- Yield: 2 servings
- Category: Snack
- Method: Grilling
- Cuisine: American
- Diet: Non-Vegetarian
Ingredients
- 4 slices bread
- 2 slices cheese
- 2 slices turkey bacon
- 2 slices chicken ham
- 2 tablespoons butter
Instructions
- Flatten the slices of bread with a rolling pin.
- Add cheese, turkey bacon, and chicken ham.
- Roll tightly and secure with a toothpick.
- Heat butter in a pan and grill the roll-ups until golden brown.
Notes
- Try using different types of cheese for flavor variations.
- Serve with a dipping sauce for added taste.
Nutrition
- Serving Size: 2 roll-ups
- Calories: 250
- Sugar: 2g
- Sodium: 800mg
- Fat: 18g
- Saturated Fat: 8g
- Unsaturated Fat: 6g
- Trans Fat: 0g
- Carbohydrates: 20g
- Fiber: 1g
- Protein: 12g
- Cholesterol: 30mg