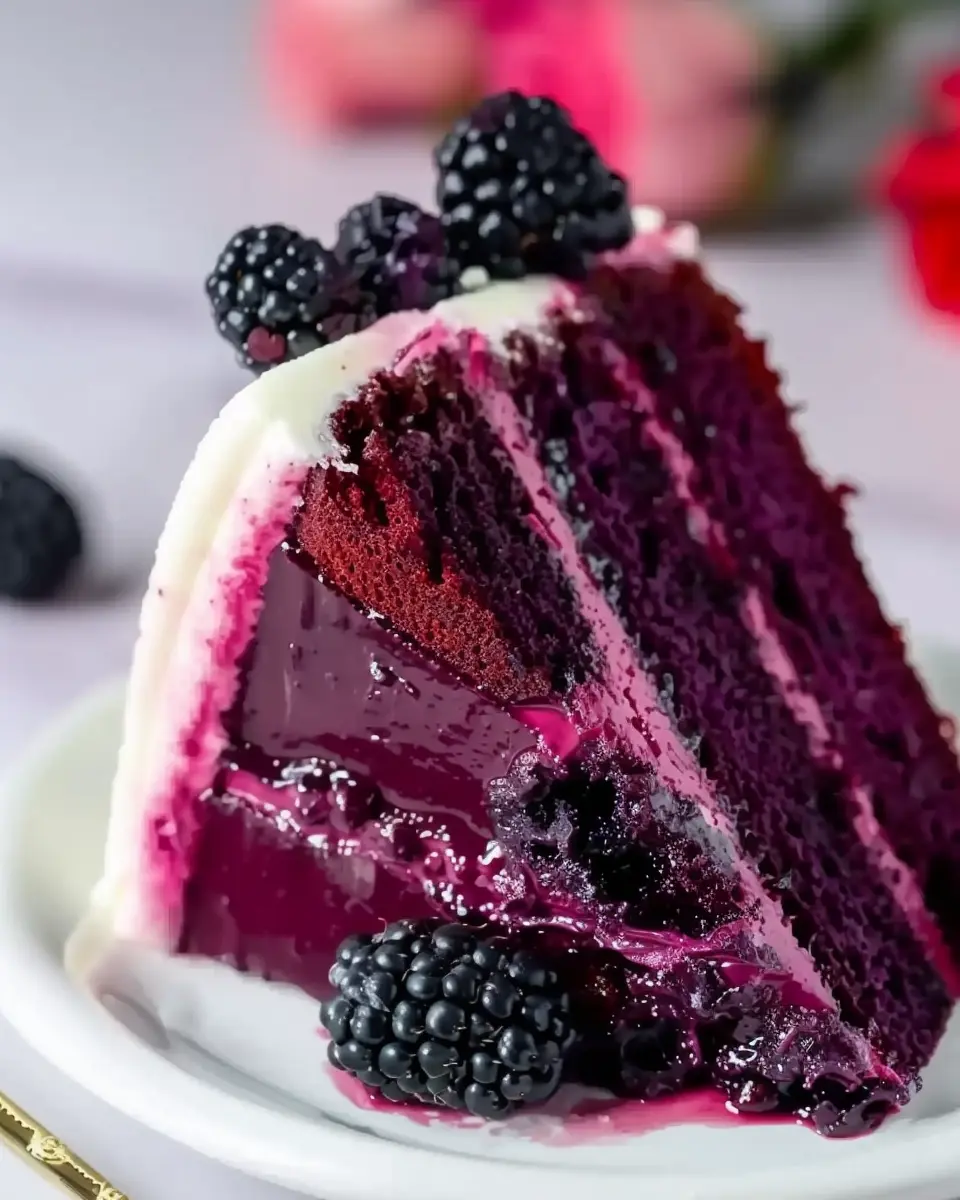
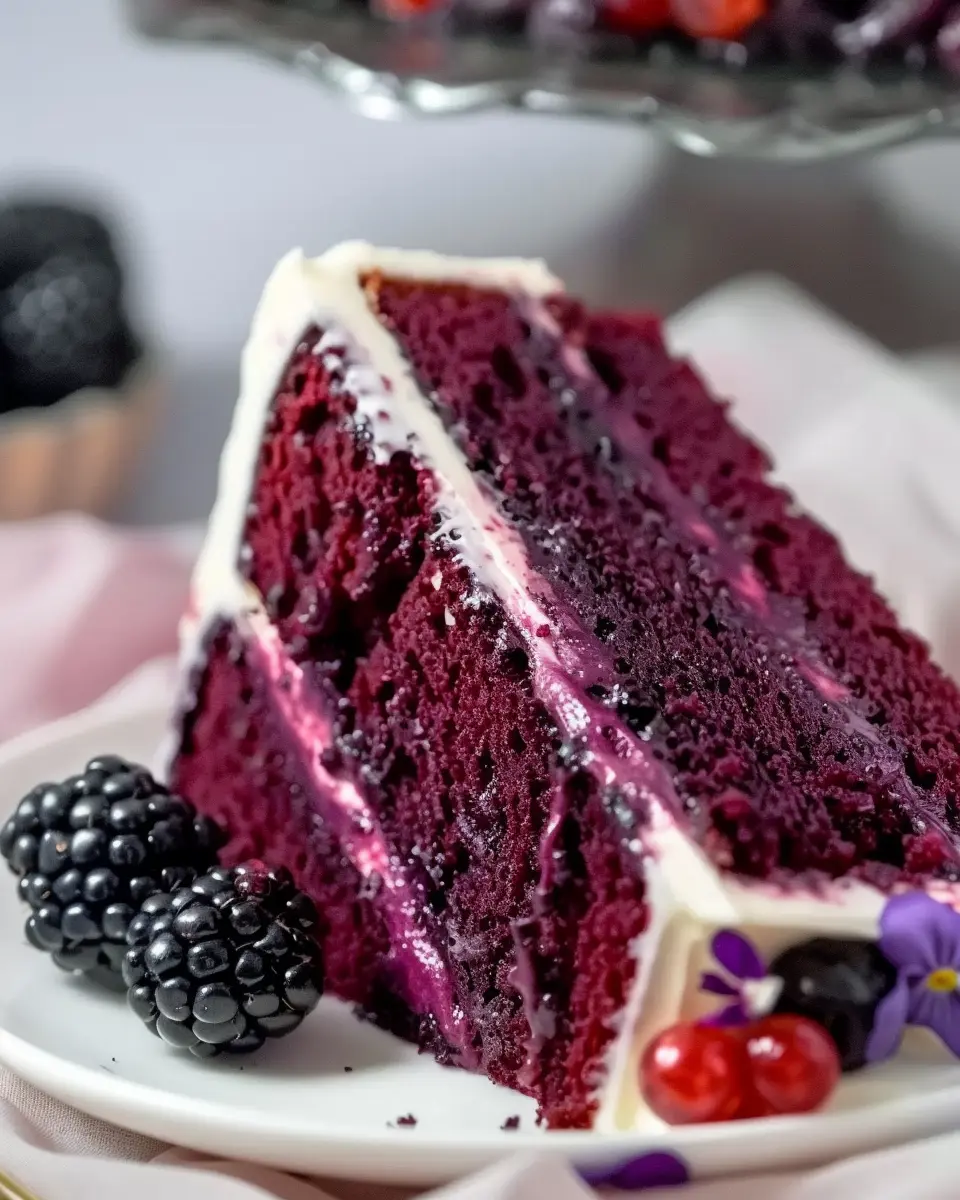
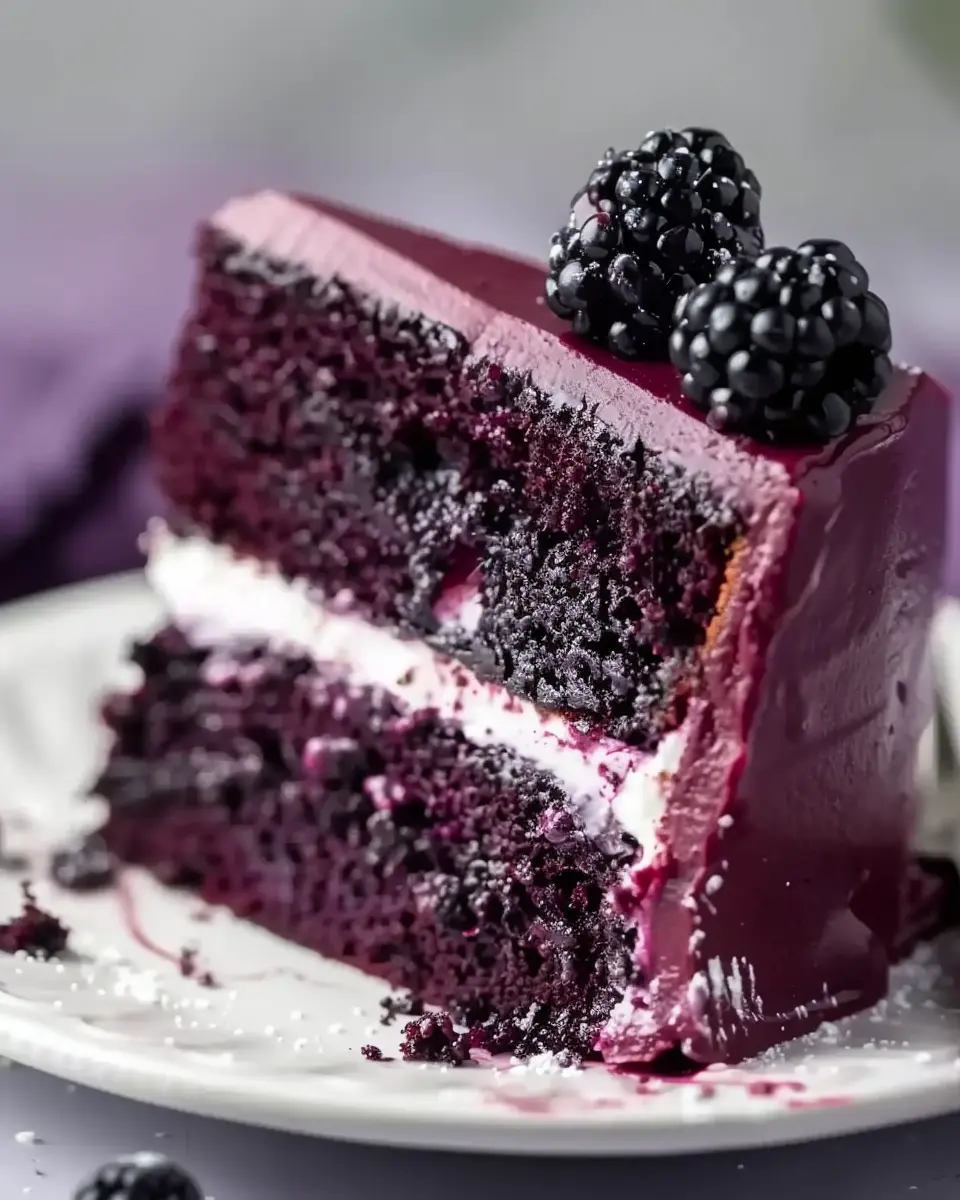
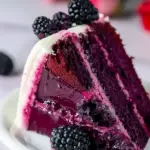
Introduction to Blackberry Velvet Cake
Are you ready to dive into the world of delightful desserts? If you’re looking for an indulgence that combines rich flavors, stunning visuals, and a touch of natural sweetness, blackberry velvet cake is your answer. This cake isn’t just a treat; it’s a homemade masterpiece that speaks to your love for baking and creativity.
Why Blackberry Velvet Cake is the Ultimate Homemade Dessert
What makes blackberry velvet cake stand out? It all begins with the ingredients. The luscious blend of ripe blackberries brings a refreshing twist to the classic velvet texture. Imagine slicing into a gorgeous, deep purple cake that’s just as beautiful as it is delicious. Blackberries are rich in antioxidants and fiber, making this cake a bit of a guilt-free indulgence.
One bite of this cake transports you to a summer afternoon, even in the heart of winter. The moist layers are complemented by creamy frosting, infused with the essence of fresh blackberries. Whether you’re celebrating a special occasion or just making a Tuesday night feel extraordinary, this cake fits the bill perfectly.
But wait, there’s more! Making blackberry velvet cake at home is not just about enjoyment; it’s also a fun activity. You can invite friends over for a baking session, or whip it up solo while listening to your favorite tunes. There’s something incredibly satisfying about creating a dessert from scratch, allowing you to impress both yourself and others.
In terms of versatility, blackberry velvet cake can easily become a custom creation. Want to add a hint of vanilla or a splash of lemon zest? Go for it! There are endless possibilities for toppings and fillings, making this cake truly your own. Plus, it’s an excellent conversation starter at gatherings. Who wouldn’t want to try a cake that not only looks fabulous but is also bursting with flavor?
So, gather your ingredients and get ready to experience the burst of flavor and joy that blackberry velvet cake can bring. For those looking to explore more recipes, check out the delightful ideas at Bon Appétit or BBC Good Food, where inspiration awaits!

Ingredients for Blackberry Velvet Cake
Creating a delightful blackberry velvet cake is not only about following a recipe but also about selecting the right ingredients that align with your tastes. Here’s a quick rundown of what you’ll need:
List of Key Ingredients
- 2 cups all-purpose flour
- 1 ½ cups granulated sugar
- 1 cup unsalted butter, softened
- 1 cup buttermilk
- 3 large eggs
- 1 cup mashed blackberries (fresh or frozen)
- 1 tablespoon vanilla extract
- 1 teaspoon baking soda
- ½ teaspoon salt
- 1 tablespoon cocoa powder (optional, for added depth)
These ingredients come together to create a rich and flavorful cake that’s perfect for special occasions or a cozy gathering with friends.
Substitutions and Alternatives
Don’t have everything on hand? No problem! You can easily make substitutions:
- Use Greek yogurt in place of buttermilk for a similar tangy flavor.
- If you want a dairy-free option, opt for almond milk and vinegar as a buttermilk substitute.
- For a different berry twist, swap blackberries with raspberries or blueberries.
By adjusting these ingredients, your blackberry velvet cake can cater to various dietary preferences. The versatility of this recipe makes it a great choice for everyone! Need more tips? Check out this article for additional ingredient variations.
Preparing the Blackberry Velvet Cake
Making a blackberry velvet cake from scratch is a delightful endeavor that rewards you with layers of rich flavor and stunning visuals. This cake is perfect for any gathering or just to satisfy your sweet tooth. Let’s dive into the detailed steps to bring your cake to life!
Step 1: Prepare Your Blackberry Reduction
To create the flavorful base of your blackberry velvet cake, start by making a blackberry reduction. This process concentrates the sweet and tart flavors of the blackberries.
- In a small saucepan, combine 2 cups of fresh blackberries with 1/4 cup sugar.
- Cook over medium heat, stirring occasionally, until the blackberries break down and release their juices, about 10 to 15 minutes.
- Once the mixture thickens slightly, strain it through a fine-mesh sieve to remove seeds and skins. Allow it to cool before using. This step not only infuses the cake with flavor but also adds a beautiful color.
Step 2: Prepping the Cake Pans and Mixing Dry Ingredients
Before diving into the mixing, ensure you’re set up for success.
- Preheat your oven to 350°F (175°C).
- Grease and flour two 9-inch round cake pans or use parchment paper for easy removal.
- In a mixing bowl, whisk together 2 ½ cups all-purpose flour, 1 tablespoon baking powder, and 1/2 teaspoon salt. This dry mixture is the foundation of your cake and ensures it rises beautifully when baked.
Step 3: Creaming Butter and Sugar Until Fluffy
The key to a moist, tender cake lies in the creaming process.
- In a large mixing bowl, beat 1 cup unsalted butter (at room temperature) with 2 cups granulated sugar using an electric mixer. Mix on medium speed until the mixture is light and fluffy, which should take about 3-5 minutes. The incorporation of air is crucial here—it contributes to the cake’s velvety texture.
Step 4: Incorporating the Wet Ingredients
This step adds moisture and flavor, enhancing your blackberry velvet cake.
- To the creamed butter and sugar, add 4 large eggs one at a time, mixing well after each addition.
- Next, incorporate 1 teaspoon vanilla extract and about 1 cup of your cooled blackberry reduction. The blend of flavors at this stage is heavenly, and you’ll notice the vibrant color of the mixture.
Step 5: Combining Wet and Dry Ingredients for the Batter
It’s time to bring everything together for the ultimate cake batter.
- Gradually add the dry ingredients to the wet mixture, alternating with 1 cup of buttermilk. Start and end with the dry ingredients, mixing just until combined (avoid overmixing to keep your cake fluffy).
- If you want to add a little extra flair, fold in a handful of fresh blackberries for pockets of juicy goodness.
Step 6: Dividing, Baking, and Cooling the Cake Layers
Now that your batter is ready, let’s get baking!
- Divide the batter evenly between the prepared cake pans. Smooth the tops with a spatula.
- Bake in the preheated oven for 25-30 minutes or until a toothpick inserted in the center comes out clean. Allow the cakes to cool in the pans for about 10 minutes before transferring to wire racks to cool completely.
Step 7: Making the Fluffy Blackberry Frosting
A cake is only as good as its frosting, and this blackberry whipped frosting is a star.
- Start with 1 cup of softened unsalted butter and beat until creamy.
- Gradually add 4 cups of powdered sugar, along with 1/4 cup of your blackberry reduction and a splash of vanilla. Beat until light and fluffy. This frosting will beautifully complement the blackberry velvet cake and carry the same delicious berry flavor.
Step 8: Assembling and Decorating the Cake
The final touches transform your cake from tasty to truly spectacular.
- Place one layer of the cake on a serving plate. Spread a generous layer of frosting on top and add any remaining fresh blackberries.
- Top with the second layer and spread frosting around the sides and on top. Feel free to get creative with your decoration—maybe add some edible flowers or fresh mint for a pop of color.
And there you have it! Your blackberry velvet cake is ready to impress friends and family alike. Enjoy every slice, knowing that you’ve crafted something truly special!
For more tips on baking techniques, you can check reputable sources such as King Arthur Baking or BBC Good Food.
Variations on Blackberry Velvet Cake
If you’re a fan of the rich, sumptuous taste of blackberry velvet cake, you’re in for a treat! There are endless ways to customize this delightful dessert. Here are some creative variations to consider, making it easier to cater to different dietary preferences and flavor profiles.
Gluten-Free Blackberry Velvet Cake
No need to miss out on this luscious cake if you’re gluten intolerant! Simply substitute regular flour with your favorite gluten-free blend. Many options are available in the market today, which mimic the texture and taste of traditional flour without sacrificing the cake’s moistness. Just make sure to check the blend includes xanthan gum, which helps provide structure.
Dairy-Free Frosting Alternatives
Those avoiding dairy can still enjoy a luscious frosting atop their cake. Consider using coconut cream as a base for your frosting; it’s wonderfully creamy and adds a subtle tropical flavor. You can also explore alternatives like almond or oat creams, which are becoming increasingly popular. Want a hint of sweetness? Just add a touch of maple syrup to your frosting for that extra bit of flavor.
Adding Different Flavors: Lemon Zest, Lavender, and More
Take your blackberry velvet cake to the next level by incorporating additional flavors. A sprinkle of lemon zest can brighten the overall taste, pairing perfectly with the blackberries. Alternatively, consider adding dried lavender for a unique floral note that’s sure to wow your guests. And don’t forget spices like cinnamon or nutmeg for warm undertones—perfect for a cozy gathering.
By exploring these variations, you’ll find that making your own version of blackberry velvet cake can be a delightful journey! For more ideas, check out Skinnytaste for some fresh inspiration on baking alternatives.
Cooking Tips and Notes for Blackberry Velvet Cake
Best Practices for Ingredient Temperature
To achieve that rich, velvety texture in your blackberry velvet cake, make sure your ingredients are at room temperature before you begin. Cold ingredients can result in a dense cake that won’t rise properly. Set out your eggs, butter, and any dairy products about 30 minutes before mixing to ensure they blend uniformly. This simple step can make a world of difference in your cake’s final texture.
Storing Leftover Cake Effectively
Once you’ve baked your delicious blackberry velvet cake, you might not want to devour it all in one sitting (though we totally understand if you do!). To keep your cake fresh, store it in an airtight container at room temperature for up to three days. If you have leftovers after that, pop it in the fridge to extend its life for about a week. For extended storage, consider freezing slices in plastic wrap, followed by aluminum foil, which can keep it tasty for up to three months.
Take these tips and watch your baking game thrive! For more insights on ingredient handling, check out King Arthur Baking for expert advice.
Serving Suggestions for Blackberry Velvet Cake
Perfect Occasions for Enjoying Blackberry Velvet Cake
When it comes to blackberry velvet cake, its rich flavors and vibrant color make it a stunning centerpiece for various occasions. Consider serving it at:
- Birthday celebrations – Surprise your loved ones with a slice of decadent sweetness.
- Spring gatherings – Its fresh berry flavor embodies the essence of the season.
- Brunch events – Elevate any morning gathering with a slice alongside your coffee.
Don’t forget to check out our post on celebrating with desserts for more inspiration!
Delicious Pairing Suggestions
Pairing your blackberry velvet cake with the right drinks and snacks can elevate the experience even further. Here are some delightful suggestions:
- Brewed beverages – Complement the cake with freshly brewed coffee or herbal teas. The bitterness of coffee contrasts beautifully with the cake’s sweetness.
- Fruity selections – A side of Greek yogurt topped with nuts can enhance the overall flavor profile and provide some added texture.
- Savory bites – Consider offering Turkey Bacon or Chicken Ham sliders for a tantalizing sweet-and-savory combination.
By thoughtfully choosing your pairings, you’ll ensure every bite is an experience to remember! For more delightful ideas on pairings, explore our guide on snack pairings.
Time Breakdown for Blackberry Velvet Cake
Preparation Time
Getting started on your blackberry velvet cake is a breeze! Set aside about 20 to 25 minutes for preparation. This includes gathering your ingredients, mixing the batter, and getting your cake pans ready. Pro tip: have everything pre-measured and within reach to streamline the process.
Baking Time
Once your oven is preheated, the actual baking will take around 30 to 35 minutes. Keep an eye on it, as every oven is unique! A toothpick inserted into the center should come out clean.
Total Time
In total, you’re looking at approximately 60 to 70 minutes from start to finish. This includes both preparation and baking time. And trust me, the delicious aroma and vibrant flavors emerging from your kitchen will be well worth every minute spent! For more tips on baking cakes perfectly, consider checking reputable baking sources like America’s Test Kitchen. Enjoy the process!
Nutritional Facts for Blackberry Velvet Cake
When indulging in a delectable blackberry velvet cake, it’s good to know a bit about the nutritional content so you can enjoy it without any guilt. Here’s a quick breakdown:
Calories per slice
Each slice of this blackberry velvet cake typically contains around 350 calories. While it’s definitely a treat, it’s made with wholesome ingredients, so you can savor each crumb.
Sugar and fat content
This scrumptious cake also has approximately 25 grams of sugar and 15 grams of fat per slice. Opting for lighter sweeteners or incorporating whole fruit could be a delightful way to keep the sweetness while reducing sugar. It’s a perfect dessert for weekend gatherings but can be balanced with a healthy meal earlier in the day.
For more tips on enjoying desserts while maintaining a healthy lifestyle, you might want to check out Healthline’s guide on balanced eating. That way, you can indulge responsibly while still enjoying every delicious bite of your blackberry velvet cake!
FAQs about Blackberry Velvet Cake
Can I use frozen blackberries?
Absolutely! Using frozen blackberries is a fantastic alternative when fresh ones aren’t available. They can add a lovely burst of flavor to your blackberry velvet cake. Just be sure to thaw them first and drain any excess moisture to avoid a soggy cake. For an even more intense flavor, consider pureeing the blackberries and swirling them into your batter.
How do I store the frosting?
Storing your frosting correctly ensures it retains its delicious texture and flavor. Allow the frosting to cool completely before transferring it to an airtight container. You can keep it in the refrigerator for up to a week. When you’re ready to use it, simply let it sit at room temperature for about 30 minutes before spreading it on your blackberry velvet cake. If you find it a bit stiff, a quick whip with a spatula can help bring it back to that perfect creamy consistency.
What’s the best way to ensure my cake doesn’t stick to the pan?
To prevent your blackberry velvet cake from sticking, here are some tried-and-true tips:
- Grease the pan thoroughly: Use butter or a non-stick spray, ensuring every corner is covered.
- Use parchment paper: Lining the bottom of your pan with parchment provides an extra layer of protection.
- Cool before removing: Let the cake cool in the pan for about 10-15 minutes, then carefully run a knife around the edges before flipping it onto a wire rack.
For further details on baking techniques, check out King Arthur Baking. Baking made easy, right? Happy baking!
Conclusion on Blackberry Velvet Cake
Final thoughts and encouragement to try the recipe
As we wrap up our sweet journey into the world of blackberry velvet cake, I genuinely hope you feel inspired to give this delightful dessert a try. The blend of rich, velvety texture with the tartness of blackberries makes for a showstopper that’s perfect for any occasion. Remember, baking is as much about having fun as it is about following the recipe. Don’t hesitate to experiment with flavors or presentation! If you’re looking for a few tips, consider checking this baking guide for some fantastic insights. Whether you’re serving it at a gathering or indulging solo, embrace the delicious results!
PrintBlackberry Velvet Cake: The Best Indulgent Dessert Recipe
This indulgent Blackberry Velvet Cake is a delightful twist on the classic red velvet cake, combining the rich flavors of blackberries with a velvety texture.
- Prep Time: 20 minutes
- Cook Time: 30 minutes
- Total Time: 50 minutes
- Yield: 10 servings
- Category: Dessert
- Method: Baking
- Cuisine: American
- Diet: Vegetarian
Ingredients
- 2 cups all-purpose flour
- 1 ½ cups sugar
- 1 cup unsalted butter, softened
- 1 cup buttermilk
- 3 large eggs
- 2 tablespoons unsweetened cocoa powder
- 1 teaspoon vanilla extract
- 1 ½ cups fresh blackberries
Instructions
- Preheat oven to 350°F (175°C).
- In a bowl, cream together the butter and sugar until light and fluffy.
- Add eggs one at a time, beating well after each addition.
- Mix in the buttermilk and vanilla extract.
- In another bowl, combine flour, cocoa powder, and blackberries.
- Gradually add dry ingredients to the wet mixture, mixing until just combined.
- Pour batter into prepared cake pans and smooth the tops.
- Bake for 25-30 minutes or until a toothpick comes out clean.
- Let cool before frosting.
Notes
- For a richer flavor, add a pinch of salt to the dry ingredients.
- Swap out blackberries for raspberries or blueberries if preferred.
Nutrition
- Serving Size: 1 slice
- Calories: 350
- Sugar: 30g
- Sodium: 200mg
- Fat: 15g
- Saturated Fat: 8g
- Unsaturated Fat: 4g
- Trans Fat: 0g
- Carbohydrates: 50g
- Fiber: 2g
- Protein: 4g
- Cholesterol: 60mg